Jesse Crosse started as a motoring hack in 1982, was launch editor of Performance Car magazine and signed up an unheard writer called Jeremy Clarkson. He now writes about automotive technology, and spends his time restoring a pair of fast Fords, a 1968 GT390 Mustang fastback, and the same Ford Sierra Cosworth long-term test car he ran while editor of Performance Car. Here he shares tech tips for the have-a-go DIY car enthusiast.
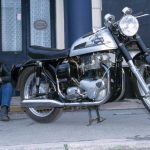
Before Dunlop perfected the disc brake and, at Reims in 1952, a Jaguar C-Type driven by Stirling Moss became the first car fitted with the new fangled stoppers to win an international race, drum brakes were all early drivers had to rely on. So much for racing cars but it would be a while before disc brakes became more commonly used on road cars and if your classic hails from the 1960s, the chances are it may have drums all round.

Even today, not all cars have disc brakes on all four wheels. Some in the low price bracket have drum brakes at the rear wheels. The performance of drum brakes doesn’t match that of more powerful discs, which not only generate more negative torque but also shed heat much more easily and so are less prone to fade.
Drum brakes can be more pernickety than discs, especially when fitted to the front. Tell tale signs that brakes need attention are a long pedal travel or the car pulling to one side of the road under braking. They consist of two semi-circular steel “shoes,” each one retained by a small coil spring and pin passing through both brake back plate and shoe, which are pushed outward by one or two hydraulic wheel or “slave” cylinders. Friction material bonded or riveted to them is forced against the inside of the brake drum when the brakes are applied.
There are two main types of drum brake, single leading shoe typically used on the rear, and more powerful twin-leading shoe fitted to the front. What’s the difference? In all drum brakes you’ll find the shoes are held together by two strong springs which resist them being prised apart by the hydraulic slave cylinders. On a single leading shoe brake, a double piston cylinder pushes the shoes apart (against the springs) at one end and they pivot on a pin attached to the brake back plate at the other. One shoe will be leading, which means at the cylinder end, only one of the shoes will meet the rotating surface of the drum at its leading edge, the other shoe will meet the rotating drum at the pivot end.
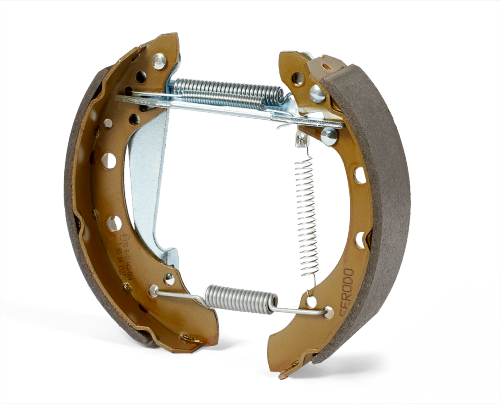
A twin leading shoe brake usually has two single piston cylinders, each one opening its shoe at the leading edge. The rear of each shoe pivots on the heel of each slave cylinder. Some drum brakes need manual adjustment (like the drum brakes on an early classic Mini for example), single leading shoes having one adjuster and twin leading shoes coming with two. Others have a self-adjusting mechanism to take up the slack as the shoes wear and maintain a firm brake pedal.
When working on brakes its important that you wear the right protective gear – gloves, a filter mask (see below) and safety glasses – and mirror any work at both ends of the same axle, whether it be adjusting or replacing cylinders or shoes. Otherwise you’ll end up with uneven braking force on each side of the car which could be dangerous. To dismantle the brake, support the car safely – you can check out my guide to lifting a car by clicking here – and remove the wheel to expose the wheel hub and drum. Most early drums will be retained by a pair of large, countersunk screws retaining it to the hub. Remove these (using an impact screwdriver which you tap with a mallet to free the screw if necessary) and the drum should wiggle off the wheel studs to expose the shoes, cylinder and backplate. If the shoes are well adjusted, it may be necessary to loosen the adjuster first. On a manual adjusting single leading shoe brake there will be a square headed bolt on the rear of the backplate on the opposite side to the brake cylinder and its hydraulic feed pipe. On a twin leading shoe brake, there will be two. Special square ring spanners are available to fit these and they’re well worth having to avoid rounding off the head.
Once apart, the brake will be full of brake dust. Avoid inhaling this stuff as it is potentially harmful, so always wear a mask. Bear in mind too, if you’re dismantling a very old brake that hasn’t seen the light of day for 50 years, the shoe brake linings (and the dust) may contain asbestos. Don’t blow the dust away; the best method is to use solvent brake cleaner, available as an aerosol or in gallon cans from a motor factor to be applied with a brush. This will clean the dust away without it becoming airborne.
By now you will be able to inspect the mechanisms and cylinders for corrosion and establish whether a slave cylinder is leaking or seized. In that case, replace all cylinders in both brakes on that axle to ensure even braking. To remove the shoes, first remove the shoe retaining pins which are usually held in against the spring by a kind of bayonet fitting washer which you push in and twist to remove. They’re likely to ping off into the distance when you do this never to be seen again, so take care if you don’t have replacements handy.
The last step is to prise the shoes apart against the two springs holding them tightly together. The springs are mighty strong, so this is easier said than done and special tools are available to help. At that point you can give everything a good clean. If the shoes are badly worn – when a lot of adjustment is needed or trailing ends of the material is much thicker than the leading end – they’ll need replacing. The same applies if any brake fluid or oil from a live axle has leaked onto them and obviously, the leak will need to be fixed before doing that. Seized or leaking cylinders aren’t worth trying to fix, new ones are quite reasonably priced. If connected to the hydraulics by a steel pipe, that may be rusted in when you try and remove it and need replacing as well. Overhaul old drum brakes and you could be opening a Pandora’s box, so be prepared to replace more than planned.
Once everything is back together adjust each brake until, when you rotate the wheel by hand, the brake just nips up and then come back a quarter of a turn on a manual adjuster. With most of the slack taken up on an auto-adjuster if the car has one, it should take care of itself after a few applications of the brake pedal before driving. All that’s left then is to get the car back on its wheels and bleed the brakes (click here to check out my earlier tech column on out how to do that). If the brakes were badly worn, or seized you should notice a big difference in pedal feel and stopping power and heading off for a drive should be safer and a whole lot more fun.
Read more
12 essential automotive chemicals for your garage
Socket Set: Maintaining your car’s ignition system
Everything you need to know about oil for your classic car