
Jesse Crosse started as a motoring hack in 1982, was launch editor of Performance Car magazine and signed up an unheard writer called Jeremy Clarkson. He now writes about automotive technology, and spends his time restoring a pair of fast Fords, a 1968 GT390 Mustang fastback, and the same Ford Sierra Cosworth long-term test car he ran while editor of Performance Car. Here he shares tech tips for the have-a-go DIY car enthusiast.
Last time, we looked at brake fluids and how they can deteriorate through water absorption, lose effectiveness and potentially corrode the braking system of a classic vehicle from the inside out if not refreshed from time to time. Although bleeding the brake system can be messy and tedious, it’s not rocket science, so here are a few pointers on how to get a good result and avoid any tears.

Classic car braking systems are generally fairly simple with a master cylinder attached to the brake pedal hydraulically connected to a wheel cylinder. Depending on the car, there may be a brake servo (booster) in between the two. Whether brakes are drum or disc, both have cylinders and pistons so the process is the same. The first thing to remember is that brake fluid attacks an old “cellulose” paint finish by eating into it quickly and vigorously. Modern two-pack finishes are resistant, but even so, take great care not to spill brake fluid on bodywork when topping up the master cylinder. Apart from anything else, it’s horribly messy stuff.
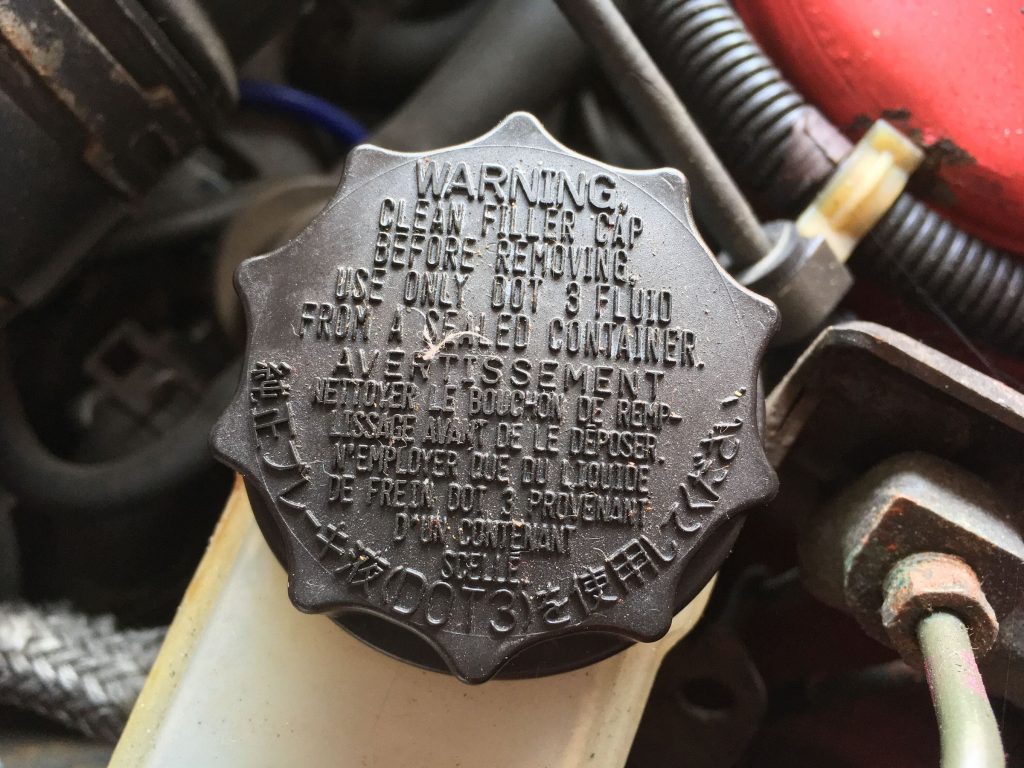
As well as fresh brake fluid, you’ll need a receptacle to catch the fluid being bled off and a piece of tube to fit snugly over the nipple on each wheel cylinder or caliper. Having removed the road wheel and safely supported the car, the sequence is to slacken a wheel cylinder or disc caliper bleed nipple (starting with the furthest away from the master cylinder) then ask a helper to depress the brake pedal, close the nipple, then release the brake pedal. Don’t release the pedal with the nipple still open, otherwise rather than the master cylinder drawing fresh fluid in from the reservoir, air will be drawn into the system. Repeat that until the fluid being pumped out of the bleed tube is free from air then tackle each of the other wheels in turn.
You can buy purpose-designed bleed bottles with one-way valves to prevent air being sucked back in to the system when the pedal is released and there are also some replacement bleed nipples on the market with integral one-way valves. The idea is to allow one-person brake bleeding, so that DIYers like you and I can just slacken the nipple, jump in the car and slowly pump the brake pedal.
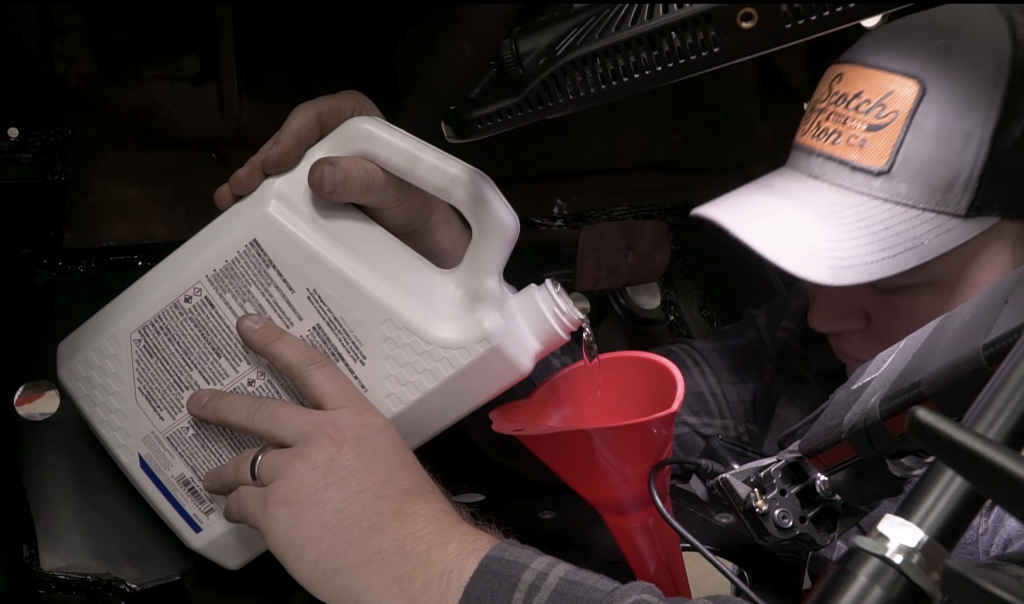
However, there’s always the chance air could be drawn back in through the slackened bleed nipple thread, or the fit of the tube on the bleed nipple may not be as good as it good be, so it’s still good practice to have an assistant to pump and release the brake pedal when you say the word. Each time the pedal is released, remember the master cylinder draws fluid in from its brake fluid reservoir, so it’s important to keep that topped up every few bleed cycles. If the reservoir empties and sucks air into the system, then the whole process starts from scratch.
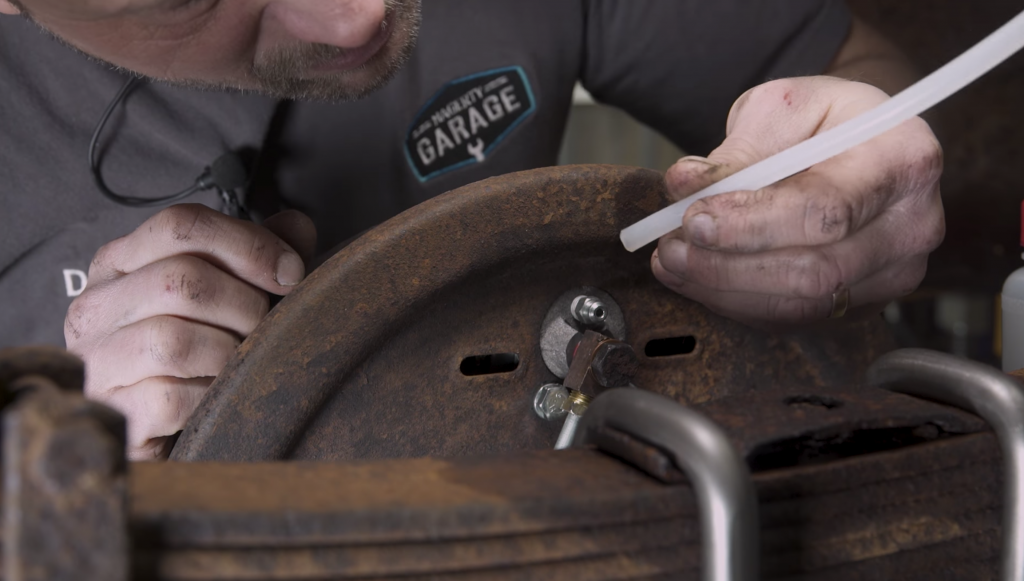
Use a ring spanner to crack open the nipple initially (don’t overdo it; half a turn or so is usually enough), then an open end spanner is OK to tweak it open for each bleed, allowing the bleed tube to be pushed fully home. Bleed nipples can be seized, so treat it with care. If it is resistant to releasing, use some penetrating fluid around the top of the thread, leave it overnight and try again. Thread sizes are quite small, typically 7/16” Unified National Fine Screw Thread (UNF) on some British pre-metric classics but on a Mini Mk1 for example, they’re a tiny 1/4” UNF and easy to strip.
While we’re on the subject of the Mini, the bleed process can difficult to start if the master cylinder has run dry or been replaced, and the early Mini with its vertically-mounted master cylinder is a good example of that. If really struggling, there are “one-person” tools available for pressurising the reservoir and although these can be messy, they’re worth bearing in mind. For most cars though, it’s usually just a question of filling the reservoir and cracking on.
If the intention is to replace the fluid completely, keep bleeding each brake until the fluid coming out is clear and fresh. If it’s just a routine bleed, a few shots until the bleed tube is free of bubbles to get any air out should do the trick. Once all four corners are bled, a quick whizz round each wheel again, just for one or two pumps, is worth doing to check for traces of air, otherwise the brake pedal should feel nice and firm and you’re ready to go.
Read more
Socket Set: What you really need to know about brake fluid
Socket Set: How to check and change spark plugs
Socket Set: How to change engine oil


That was a interesting tip about closing the bleed nipple each time before releasing the brake pedal. I usually got the assistant to keep pushing the pedal until no air came through.