Richard Tipper has been valeting cars of all shapes and sizes since 1989, and can spend up to a week detailing every inch of a car. He has gone through more cleaning accessories and products than you’ll find on the shelves of an automotive superstore. These are Tipper’s Tips for the Hagerty community.
Last time around we went over what a rotary polisher is and what it does, so you should have a little idea by now of whether it’s for you. That being the case, you’re probably going to want to know how to actually use it, and just like anything else there’s a bit of technique to getting the best from the tools at hand.
Part of that is in the preparation, which we’ve also covered earlier – particularly giving the car a good clean and using a clay bar to pick up contaminants in the surface of the paintwork. Miss out those steps and you won’t get the best results from polishing, but even more vitally, failing to do so leaves you open to the risk of picking up stray particles with the polishing pad and inflicting even more swirls.
The next step is inspection of the area you’re planning to polish. Which areas need attention? How deep are the scratches? And most importantly, how deep is the paint itself? The latter in particular is something you won’t be able to tell just at a glance, but luckily there are tools available here to help us, known as depth gauges.
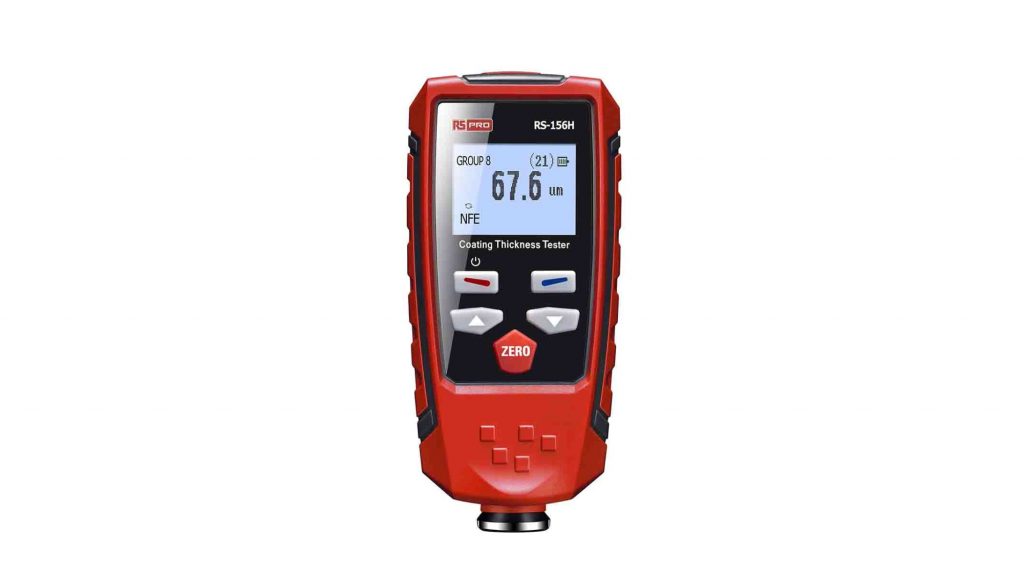
One type is known as an “overall” depth gauge, which uses magnetism on ferrous and non-ferrous metals. The other is an ultrasound gauge, which can measure the thickness of up to three layers by bouncing sound waves down to the panel and measuring the return echo.
As you can imagine, the ultrasound method is particularly useful on any non-magnetic panel, meaning everything from plastic bumpers and spoilers to fibreglass and carbonfibre. The ability to measure several layers is also useful for accurate measurements of how much lacquer we can machine away without burning through. Prices vary, but magnetic gauges start around £30, while you can pay more than £100 for accurate ultrasound models.
Then it’s on to the cutting process, which also requires preparation, namely the application of high-quality masking tape to protect vulnerable areas (and also denote areas that require particular attention). As with the rotary tools themselves there are several options for the polishing pads and cutting paste, and the best products will tend to yield the best results – with the right technique, of course.
As mentioned last time a dual-action polisher is easier for beginners to get to grips with, reducing the risk of burning through the surface you’re trying to polish from using the wrong speed, pattern or pressure. It’s still wise starting on small imperfections first rather than attempting to cover a whole car out of the gate, but online video tutorials can be invaluable for picking up the basics – there are so many variables depending on where you’re working and the level of imperfections that it can’t really be described in words alone.
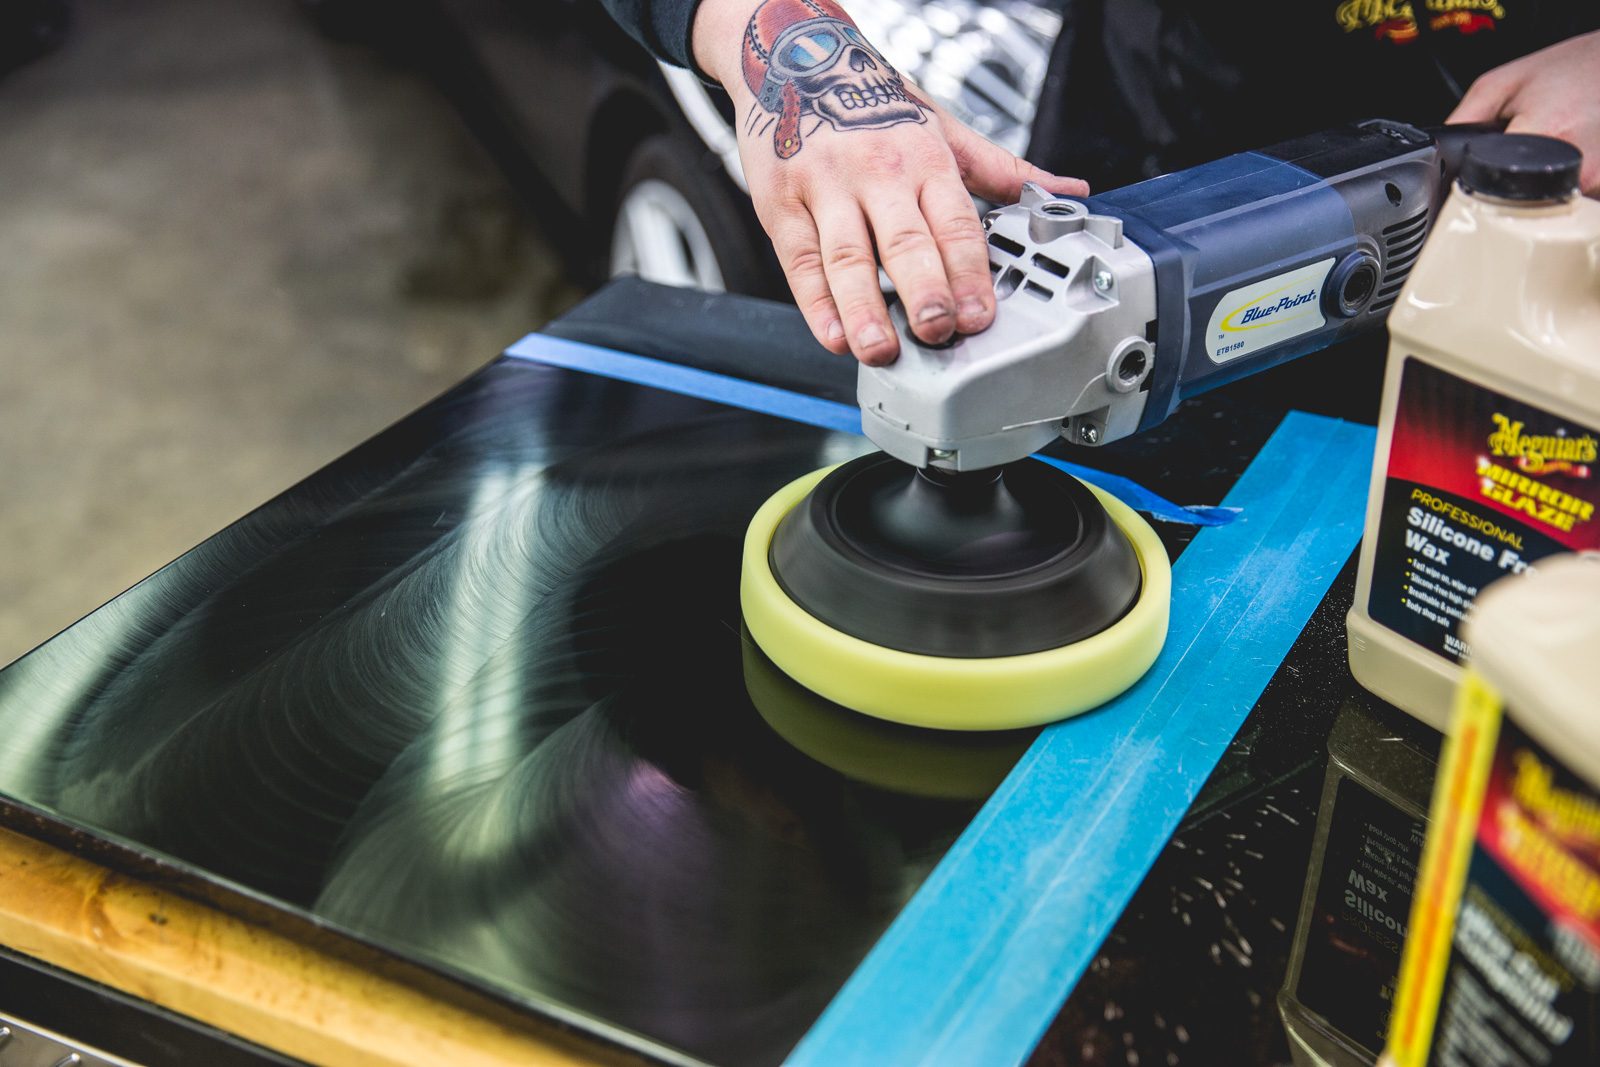
But, find that sweet spot of using the polishing machine at the correct speed, with the correct pressure for the correct duration, and applying the correct amount of the correct paste to the correct pad will, in theory, result in the perfect finish!
Even then, you may still need to “correct” a few things… and that’s where refining comes in. The initial polishing process can create very faint swirls, known as holograms or hazing. Using a softer pad with a finer paste – but similar techniques to cutting through deeper scratches – can tidy up this hazing. During the inspection stage you might notice defects so slight that the first stage isn’t required, and that being the case those softer pads and finer paste might be enough to correct the paint finish. Again, there’s no real shortcut to knowing this; experience will give you the ability to recognise how much work you’ll need to do.
And finally comes the most satisfying part of the machine polishing stages, the finishing. If you’ve done everything right so far it also requires the least effort, but is still worth doing properly, sealing the paint with waxes, or maybe even ceramic or acrylic sealants. All will keep those hours of polishing looking good in the weeks and months ahead.
Also read
Elbow Grease: Want to know how to polish a car? Buy a rotary polisher
Socket Set: A beginner’s guide to changing brake fluid
The Revival Guide: How to get your classic car ready for the road