I don’t enjoy MOT time probably because I don’t like tests in general. Having substantially recommissioned and partly rebuilt my Sierra “Cossie” after being re-united with it five years ago, further work is strictly on a maintenance basis until I’ve finished other stuff. Last year’s test was pretty much a formality but this year I got caught out having done some decent mileage in the Scottish Borders for a magazine feature a few months before.
The track control arms were one of the few things that haven’t been replaced since I got the Cossie and the outer ball joints attaching them to the steering hubs had finally loosened up on both sides. Sierra track control arms are not serviceable but original spec replacements are available from Burton Power and duly arrived in the post.

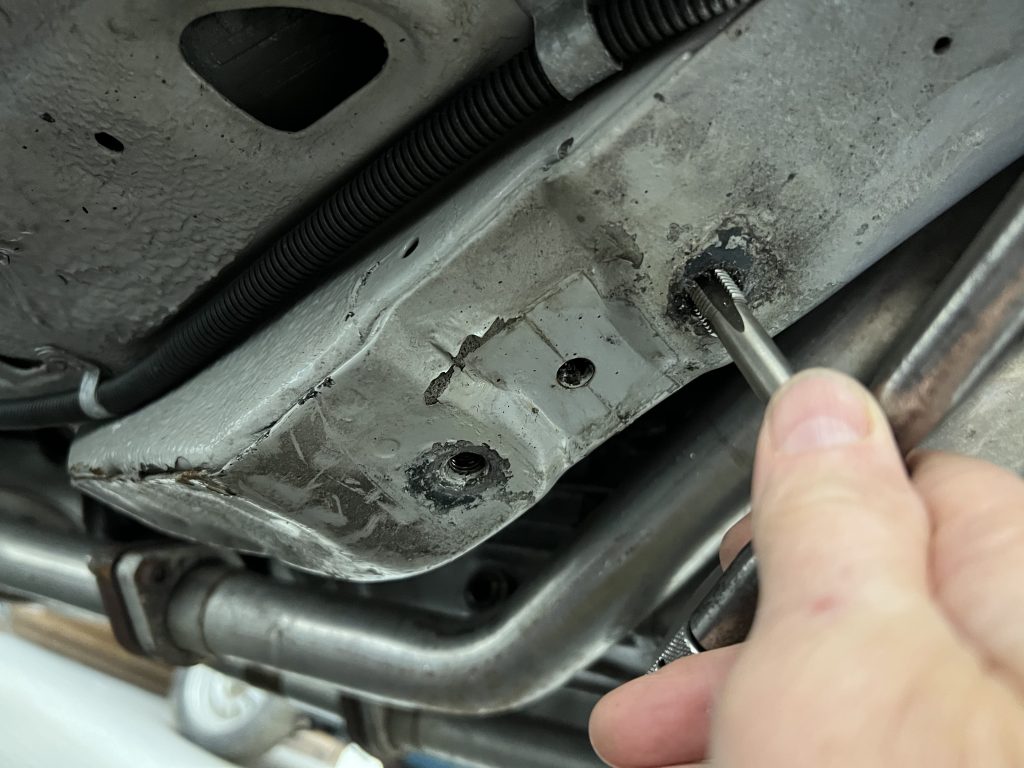
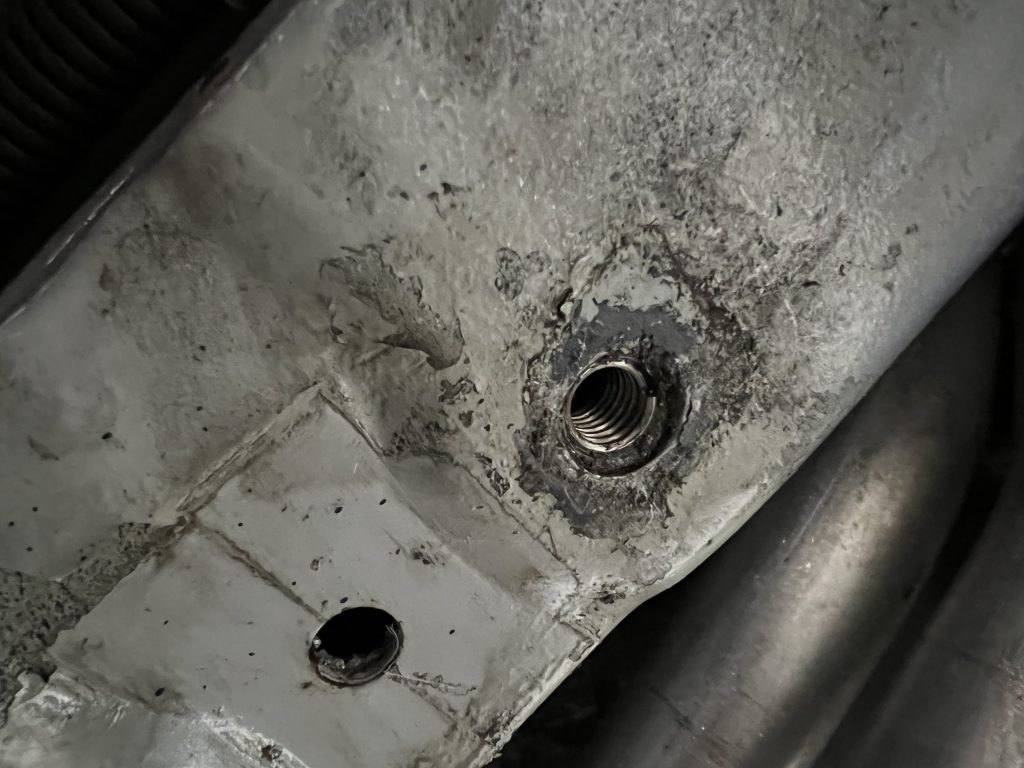
Replacement should be fairly straightforward but as is often the case on a car that’s seen some life, I soon uncovered a bodge that needed sorting. I hadn’t had any reason to remove the front anti-roll bar at this point and thought nothing of it. It’s mounted onto the chassis rails behind the engine bay by two clamps and bushes, so four bolts in total which screw directly into threaded bosses in the rails. Three came out fine but the fourth just kept turning. The thread in the chassis rail had been stripped and the chosen solution by the perpetrator had been simply to fit a nut on a longer bolt behind it. Luckily for them there was an existing opening in the side of the rail allowing access.
The chassis rails are reinforced at that point and the captive threads a good depth so my first approach would be the least interventional, to reach for the Helicoil insert kit and repair the thread. My concern in this case was that the movement of the bolt for however long it had been like this, had worn the bore of the stripped thread oversize. If that was the case, then there may not have been enough meat left to drill, tap and fit the Helicoil
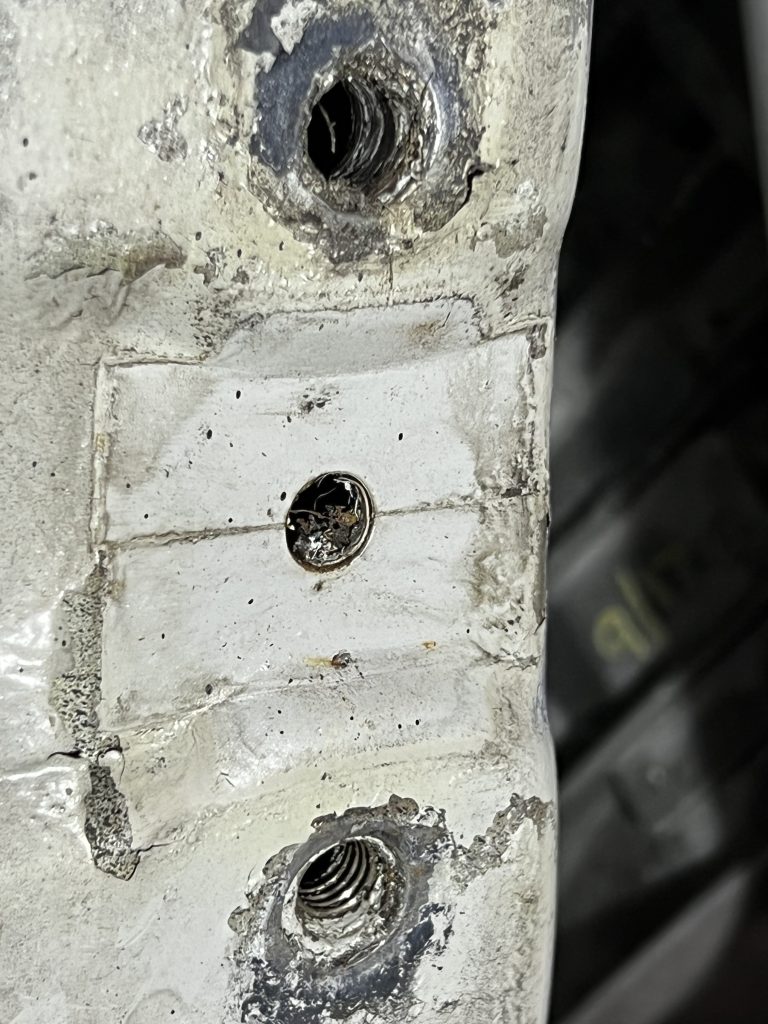
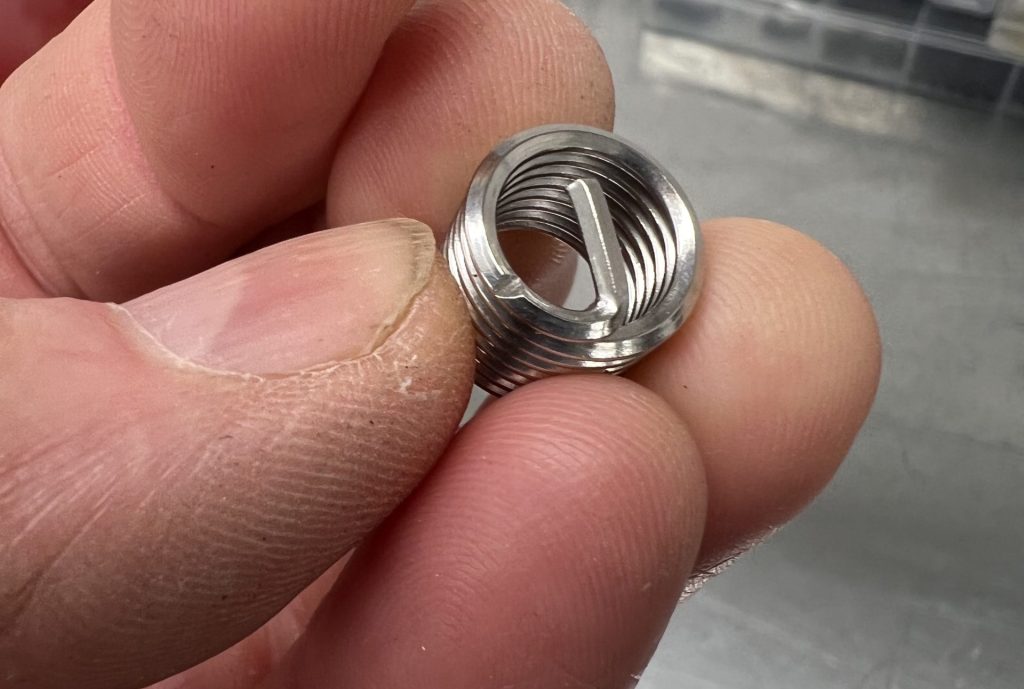
I could still see traces of the old thread so felt optimistic and set to with the drill supplied for the 10mm inserts which I had “in stock” in the tool cabinet. The more I’ve used Helicoils over the years, the more confident I’ve become in their effectiveness and in steel, there’s an even better chance they will make a strong and permanent repair.
This one was a little more challenging than most because I had to make the drilling clean and quick so as not to drill the hole oval or chamfered in any way. With a slowish speed set on the drill appropriate to the drill size and material I made a start. Because not much material is being removed in this process, it’s actually less daunting than it might seem and in this case the drill bit into the steel cleanly with no snagging.
Next job was to tap the thread for the Helicoil with the tap supplied in the kit. Again, that was easy enough even though it was an “in situ” job. The key, as always, is to start the thread absolutely dead straight then advance a quarter of a turn at a time and back off again to clear the fresh cut and free the tap. As usual, the tap should be lubricated and either emulsified cutting lubricant or a little oil is fine. This time I used oil to help overcome gravity and the result looked perfect. After that, a quick degrease with aerosol brake cleaner and in this case, I used a light smear of Locktite to be absolutely sure the insert would stay put for good. It takes just a few (but careful) seconds to install the insert and snap the tang off with the supplied punch and then it’s “job done” with a sigh of relief. Replacing the anti-roll bar revealed how the damage occurred. The large rubber bushes make it difficult to start the bolts dead straight and if time and care isn’t taken, a crossed-thread is inevitable.
If you’re embarking on a restoration of an older car, or are just keep on top of maintenance of your existing pride and joy, a HeliCoil kit is a useful garage companion for any have-a-go DIYer.
Check out the Hagerty Media homepage for daily news, features, interviews and buying guides, or better still, bookmark it.