
Author: Edd China
Hopefully you’ve enjoyed a wonderful summer of driving in your classic but if you’ve noticed a few niggles or it hasn’t been performing the way it should do, these five often forgotten classic car checks might shed light on what’s been going on.
Address any issues now and you’ll transform your car’s performance as well as ensure it goes to bed for the winter ready for its reawakening next season.
1. Are your tyres tired?
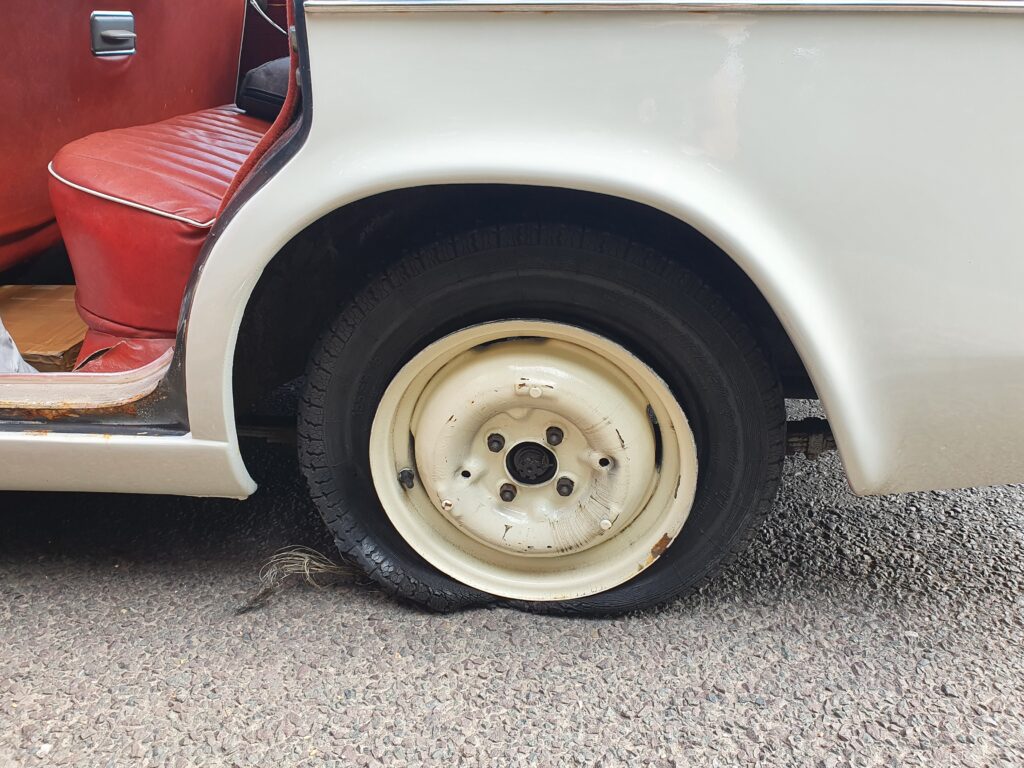
As your tyres get older they get less good at doing what they’re supposed to do, i.e. grip the road, which becomes very dangerous and also quite scary. That’s why there’s a law about the tread depth, but their general condition is something that is easily overlooked. Over time tyre rubber goes hard, which leads to a loss of traction, and eventually it’ll perish, so if you haven’t checked them recently, it’s a good idea to look for splits that are hiding away in the grooves between the tyre tread as well as cracks in the sidewalls.
If your car is old enough it’s possible that your tyres don’t have a date on them, in which case they should definitely be changed; nowadays tyres older than ten years can be classed as a ‘dangerous defect’ in the eyes of the law, even if they still seem to do a good job. Look for the DOT code and its last four digits; the first pair are the week, the second pair the year.
You can expect anything from twenty to forty thousand miles of use out of a tyre but the driven axle will wear down tyres as much as twice as quickly, so swap any same-sized tyres from front to back every five thousand miles or so to get the most out of all four. Companies like Vintage Tyres, in Beaulieu, sell new original-style tyres so you can keep your car’s period groove while keeping it out of a ditch.
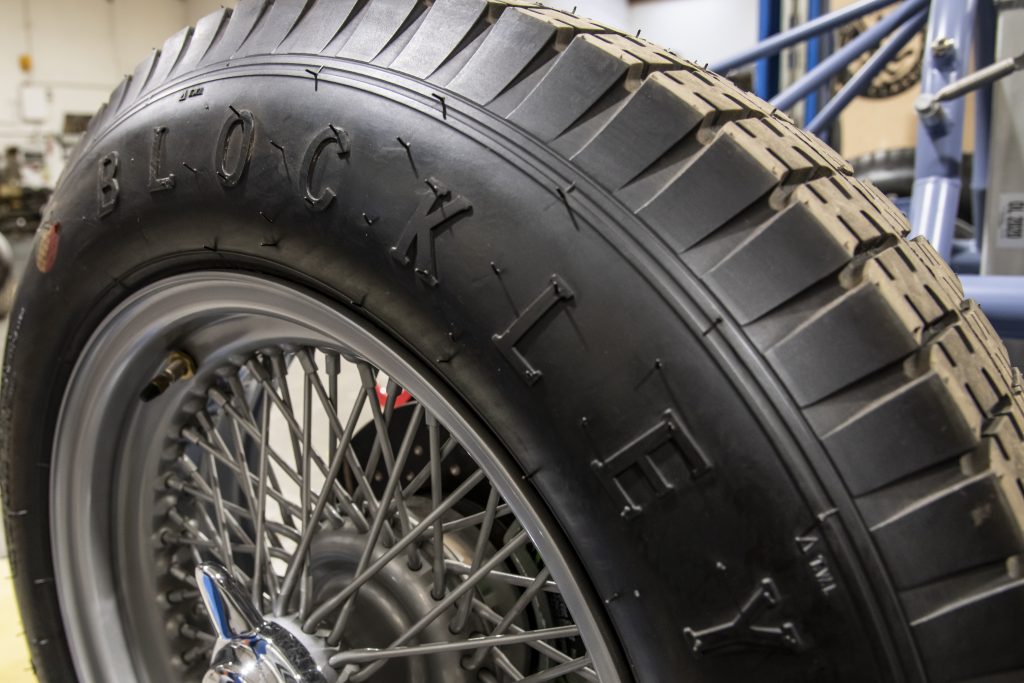
If their condition is OK, but you’ve got different makes of tyre around your car, make sure you’ve at least got the same make and the same model on the same axle – on 4WD vehicles, all four tyres should be the same but the more off-road and knobbly they are the less you will notice slight differences between how the front and rear axles are shod.
I once did an experiment with a Volkswagen-based sandrail, an off-road car that consisted of little more than a steel tube frame, a rear mounted engine and transaxle and some wheels; I put old crossply tyres on the front and modern radials on the rear, just to see what would happen. It was an exciting and educational experience because the extra rear grip delivered great acceleration but the steering lacked a certain directional influence resulting in many missed exits on roundabouts and a lot of rumble strip action on corners!
But, when I swapped them front to back, the fear was transformed into fun; I could wheel spin for miles, powersliding the back end all over the road, while enjoying fabulously grippy and precise steering. I believe the moral of such an empirical ‘control’ experiment is never to mix crossplies and radials.
I’ve had all kind of experiences with tyres going wrong – I’ve had remoulds [an old tyre that has been given a new surface or tread so it can be used again] disintegrate as I’ve been driving along because the new tread has peeled off and flung itself at speed in different directions; clearly old or low quality tyres are not how one should roll, always go for the best quality you can afford.
2. How precise is your classic’s four-wheel alignment?
Assuming the tyres are all good, the next thing to look at is the car’s four-wheel alignment, also known as tracking, which refers to the position and direction of all of the wheels in relation to each other. If the alignment isn’t set up properly, you may have noticed the car pulling gently to one side of the road, uneven wearing on your tyres, the car’s grip being compromised going around corners, or even crabbing; the feeling of going along slightly sideways.
If you want to try this at home, you can see how I set up the four-wheel alignment on the Outspan Orange, which is fundamentally a custom Mini, in the episode of Workshop Diaries above, using an old-school method with some pretty affordable low-tech wheel alignment devices.
I also tackle the suspension set up and wheel alignment on a Mini Cooper S rally car using modern laser alignment equipment in this episode:
Either way the principles are the same, getting the car’s wheels to point in the same direction, mostly parallel to the direction of the car, with some subtle but critical deviations to ensure maximum grip in cornering. It’s all about thrust angle, camber, castor, toe and contact patches.
It might sound too complex to bother with but getting your car set up correctly will make all the difference to its handling, grip and tyre wear so your tyres will last longer and your drive will be more rewarding. Remember to use a torque wrench rather than an impact gun for the final tightening of your nuts.
3. Are your classic’s dampers and springs giving you a smooth and stable ride?
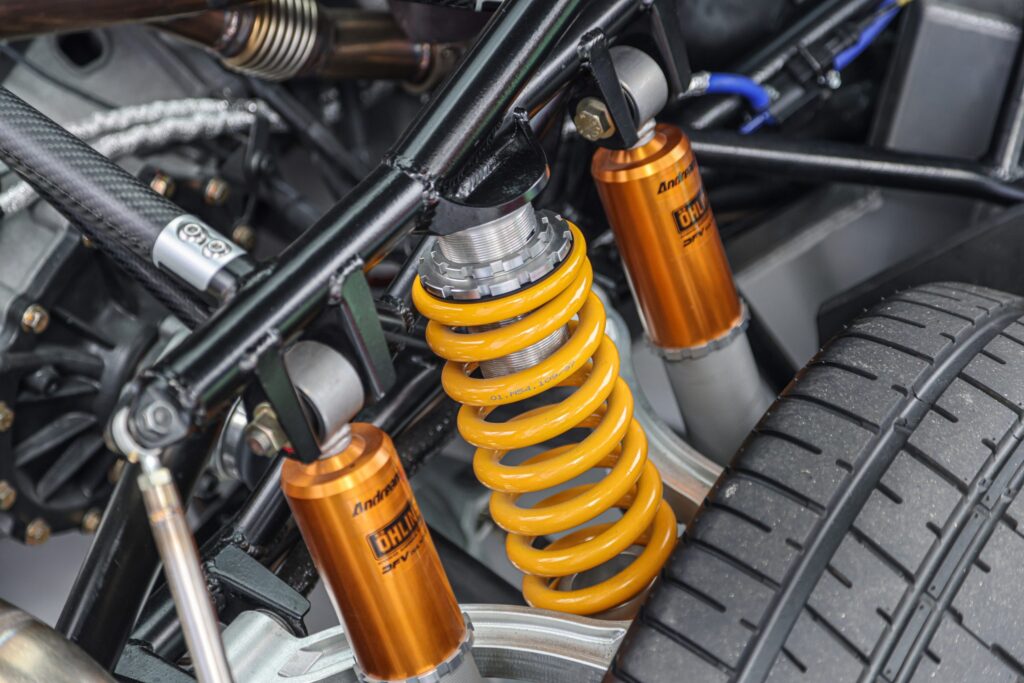
The classic way to check if the dampers (‘shock absorbers’ although technically it is the spring that absorbs the shock) are working properly is to conduct a bounce test. To do this, take it in turn to lean on each corner of the car, push it down hard and let go straight away; the car should bounce up and down and settle quickly.
Heavier cars or off-roaders may require a number of increasing bounces to get enough travel but if a corner keeps moving or bounces more than once or one corner of the four behaves differently, there’s probably something wrong. Next, conduct a visual check to see if any of the seals have leaked; a shock absorber should be nice and dry on the outside so moisture or a collection of dirt could suggest a failed seal.
If you’ve noticed strange vibrations or a lot of noise coming from one corner of the car when you’re driving, that’s another indication that something could be wrong. Excessive body roll on cornering or excessive lift on hard acceleration or diving when braking can also be a bad sign.

It’s all about trying to keep all of the tyres in contact with the road all of the time. Losing a small amount of that contact can mean losing a lot of your grip. If your dampers aren’t working properly, the car’s centre of gravity can move around excessively during cornering and braking, reducing the overall tyre contact with the road, just when you need it most. The cost of a new set of dampers will be far less shocking than the repair bill for accident damage.
If your car is listing or sagging to one corner it could be suffering from a cracked or broken spring. Some cars like the classic Mini don’t actually have metal springs, they have rubber cones, Metros used hydraulic spheres and Range Rovers are infamous for their airbags, all of which can degrade over time leaving your pride and joy looking a little forlorn.
Beaulieu Motor Museum recently got in touch when their Mini based Outspan Orange was looking a little flat for their 50th Anniversary; it had been on display for so long the front suspension had started sagging, turning the once edgy hot-rod rake into a less flattering mid-life slump. One side had collapsed more than the other but squeezing in a pair of new rubber cones, a pithy job at the best of times, restored its perky poise.
4. Are your valve clearances too gappy?
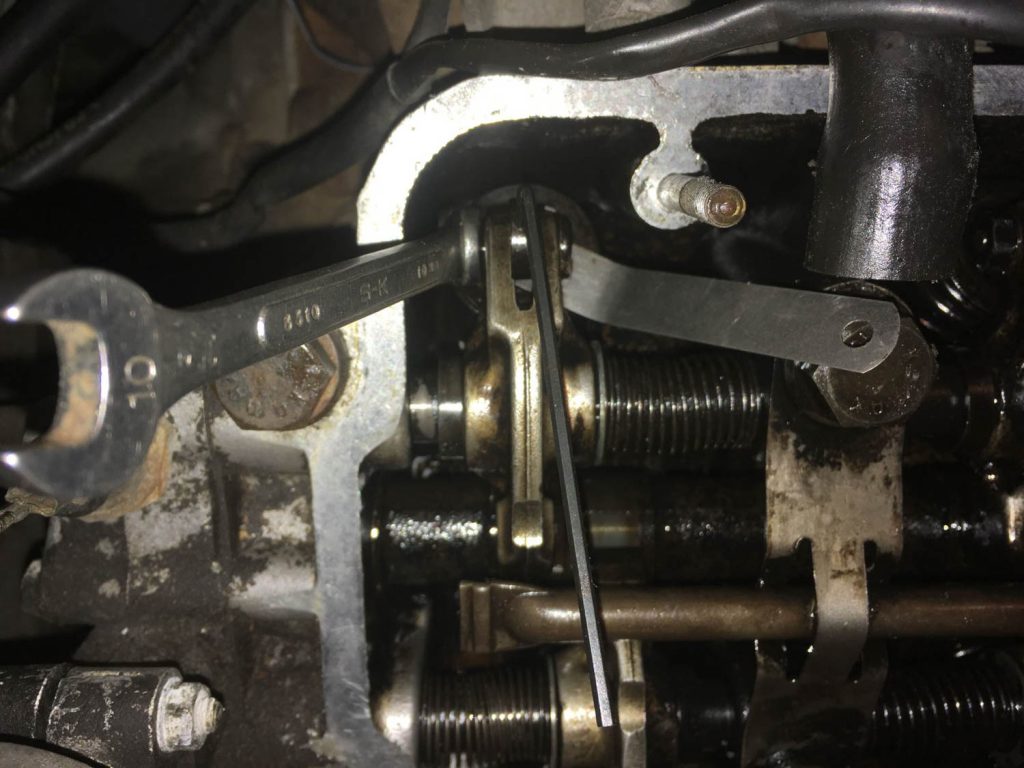
Correct valve (tappet) clearance in an older car is key to its performance. All the metal parts in the engine expand as they get up to temperature so the factory design has an exact amount of gap when the engine is cold to account for this.
Too much gap means more clattery noise and a lack of power as the valves open less and for less of their cycle so less fuel/air mixture can get in and less exhaust can get out. Too little gap can mean the valves might never completely close, parts might bend and the gases leaking past the valves could burn the valve seats and lower the compression, also sapping power.
Setting your engine’s timing accurately is a fiddly but satisfying job and will maximise the efficiency and power of your motor. To see how I did it on the Outspan Orange, you can watch this episode of Workshop Diaries, and you may also find instructions in an owner’s manual or workshop guide. You’ll need a feeler gauge, the correct size ring spanner, and a screwdriver.
Before you start fiddling and making adjustments, insert the feeler gauge between the rocker and valve stem to get an idea of how it feels. Essentially what you are looking for is a light drag between the two pieces of metal. So, what is a ‘light drag’? Well, if you were to pinch to top of a magazine, or a thicker sheet of A4 paper, between you thumb and finger, just enough so you don’t drop it, then, without changing your grip, you use your other hand to push and pull the magazine through your grip you’d be getting somewhere close.
The ‘mechanic’s touch’ is a weird thing but you can kind of dial it in with enough practice. The process involves winding the engine over by hand which is a great opportunity to feel for tightness – the more hands-on you are with that kind of job, the more you get to know your engine and its foibles. Removing the rocker cover is also a good excuse to fit a new gasket to fix, or prevent, any oil leaks.
It should be done at least once a year, but most of my classic air-cooled VW manuals recommend doing it at the beginning of the summer and then again when winter starts because the outside temperature impacts the component tolerances. Again, if you’re not feeling confident then enlist help from someone with a bit of knowledge before you fiddle with the carb or dizzy. Getting to know your engine and maximising its power and efficiency will give you more miles for your money and more fun for your money too.
5. How good is the go-juice?

There are still a few petrol stations around that sell lead replacement 4-star but they are few and far between. Most of us will have to make do with fuel containing ethanol and in that instance I will only reach for the E5.
Unless you plan on changing the rubber parts (and even some fragile metal parts) of your classic’s fuel system I would always steer clear of anything with more than 5 per cent ethanol like E10 and E15. If you tend to drive very low miles each year or always park your classic car, bike or boat up for the winter then draining the fuel out completely is a great idea, it can help prevent corrosion and avoids the issues of trying to start an engine on stale fuel.
Fuel does go off over time and the volatile parts that make the bangs so good will try to escape the confines of the tank from the moment they are pumped in. Modern fuel seems to lose its potency quicker than ever so if you drag your classic out of a long hibernation in storage, why not treat it to a good long drink of pump-fresh fuel to give it the best chance of starting in the Spring?
Certainly don’t use the yellowy sludge in the jerry can jammed behind the tool box for the last two years. Stale fuel does have a distinctive, less pungent, rather flat smell; once you’ve smelt it you will never forget the oily sweetness that lacks the heady sting of those vital vapours. Drain it, flush it out and change it for the good stuff before doing anything.
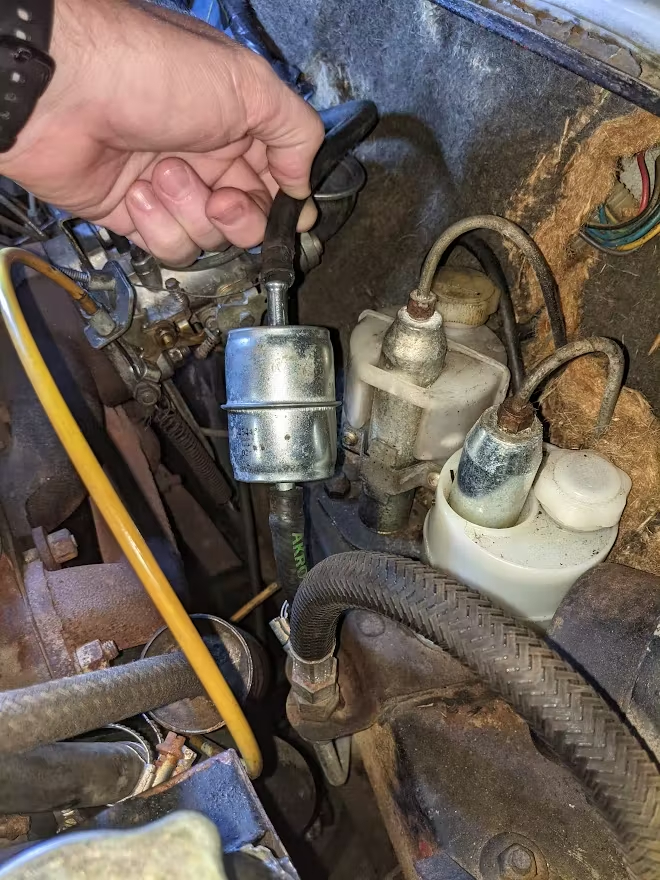
It’s important to keep on top of fuel filter health too because they can fill up with gunk and dirt, get damaged and perish over time – by doing this you can also spot other developing problems. The Outspan Orange had been standing for ages and when I checked the fuel filter I noticed the rubber fuel lines were weeping quite dramatically, which could have been catastrophic.
I also changed the Orange’s filter to a transparent one so I can see if the fuel is flowing; many people are nervous about installing a glass filter because of the risk of breakage but plenty of see-through plastic versions are available. If your fuel filter is full of orange or brown residue then it’s quite likely your fuel tank is rusting and nasty bits of metal are being pumped towards your engine so don’t delay in sorting that out. Many fuel filters can be taken apart for cleaning and if your tank is rusting away quietly there are plenty of paint and liquid liner systems out there to remedy the rot.
Some of this is quite technical stuff, and you don’t necessarily have to understand it all, but you do have to make sure that it’s right. I’d always be inclined to take any classic to have an MoT, even if it risks having a failure on the car’s record, because it means that somebody who is perhaps a little more qualified (and a little less precious about your car), will be able to go through all these tests for you, especially if you haven’t got a ramp at home.
The whole point of this five-step exercise is about being more aware of your classic so that you can spot something before it goes wrong. Look after it, and it’ll look after you. It’s as simple as that!
Read more
Edducation: Five essential classic car health checks
Socket Set: Tappet adjustment on classic four-cylinder engines
6 essentials for your travel toolkit


Great advice, and the sort I’ve been passing on to friends and family. Goes for moderns too !