
Releasing the air trapped in your car’s hydraulic brake system is crucial. Brake systems rely on a master cylinder to push fluid through the lines, and the fluid then imparts force on the piston (or pistons) in an individual wheel’s brake cylinders or calipers. The piston squeezes the brake drum or rotor, using friction to turn speed into heat and bringing the vehicle to a halt. The fluid is very efficient at activating the cylinder/caliper because it is nearly incompressible.
On the other hand, air is compressible; when it’s trapped in your brake lines, air can result in a spongy pedal and an ineffective stopping system. (Modern braking systems also use an electronically controlled distribution block for antilock- and traction-control systems, and the blocks are sensitive to air and to degraded fluid.)

So we agree that you want to keep air out of the system, but on the off chance that a few bubbles sneak in during a project, how remove you do them from the vehicle’s brake lines? There are multiple ways to bleed a brake system, and understanding each method is important so that you can decide the best approach for your project.
Gravity

Let’s start with the easiest of all the options: Doing nothing. Well, almost nothing. The concept here is simple. By filling the master cylinder and opening the bleeder screws at each wheel, gravity will gradually force the fluid through the lines and push out the air bubbles.
This method requires the appropriate tools to catch the fluid as it drips out of the bleeders. In addition, you must ensure the reservoir for the master cylinder never runs dry. Letting it run dry reintroduces air into the system, and you’ll have to drain all the fluid and start from scratch.
What sounds like the simplest method is actually one that’s very situationally dependent. Simple brake systems like those found on early hydraulic-brake-equipped cars can possibly be finished after a gravity bleed, but more often than not, the gravity approach is just the first step of bleeding a system. One of the following processes is usually needed to finish the job.
Pump and pass
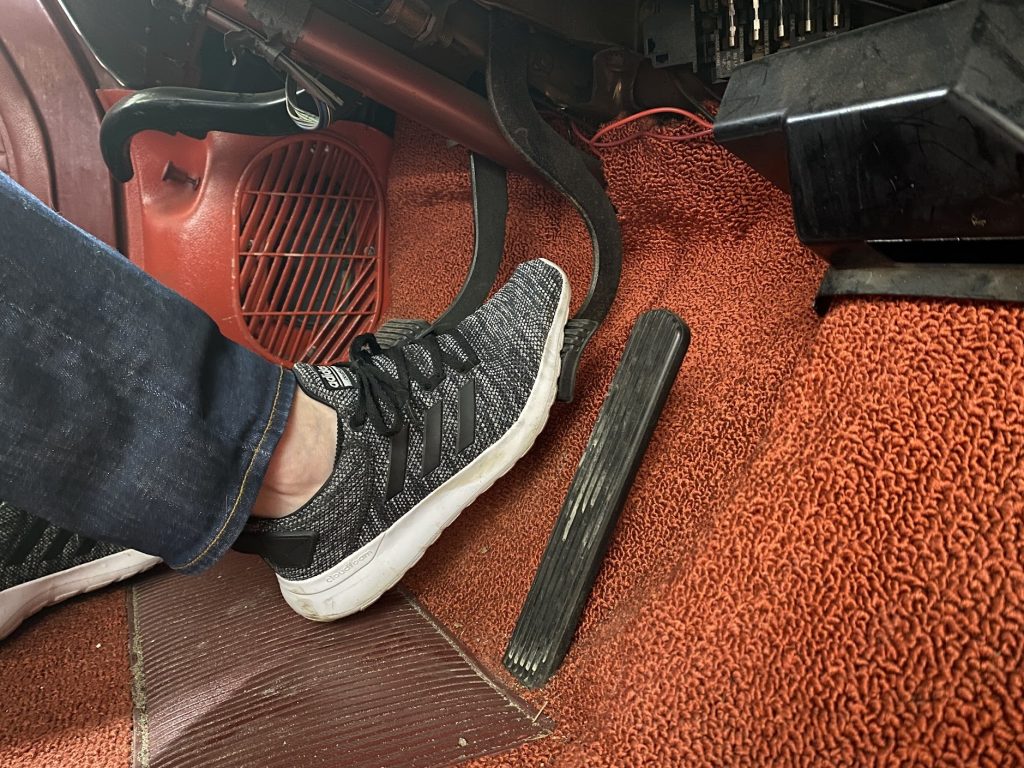
Rather than leave the dirty work to gravity alone, sometimes it’s best to make the system work for you. That means using brake pressure to push fluid through the lines. You’ve likely performed this method before: ask a friend to pump the brake pedal three to four times to build up pressure, and then tell them to hold their foot on the pedal while you open the bleeder screw at one wheel. This allows the system to burp fluid – and, hopefully, air bubbles. Close the bleeder before your helper releases the brake pedal and repeat the process until no more air bubbles exit when the bleeder screw is opened.
There are a couple of things that make this pumping method more effective than gravity bleeding. For one, the fluid moves faster, making it more likely to force out any trapped air. Then there’s the fact that building pressure in the system shrinks the air bubbles – because the air compresses – so it condenses large bubbles and speeds their evacuation.
The pump-and-pass method can help when your brake lines have multiple unions, bends, or valves. Each of those tends to allow air pockets to hang around, causing frustration if you stick with just gravity bleeding.
Check valve
The pump-and-pass method is the most popular, but it can be tedious and time-consuming for the person helping inside the vehicle. Luckily there is a way to eliminate the need for an extra pair of hands – well, feet – and it doesn’t require fancy tools.
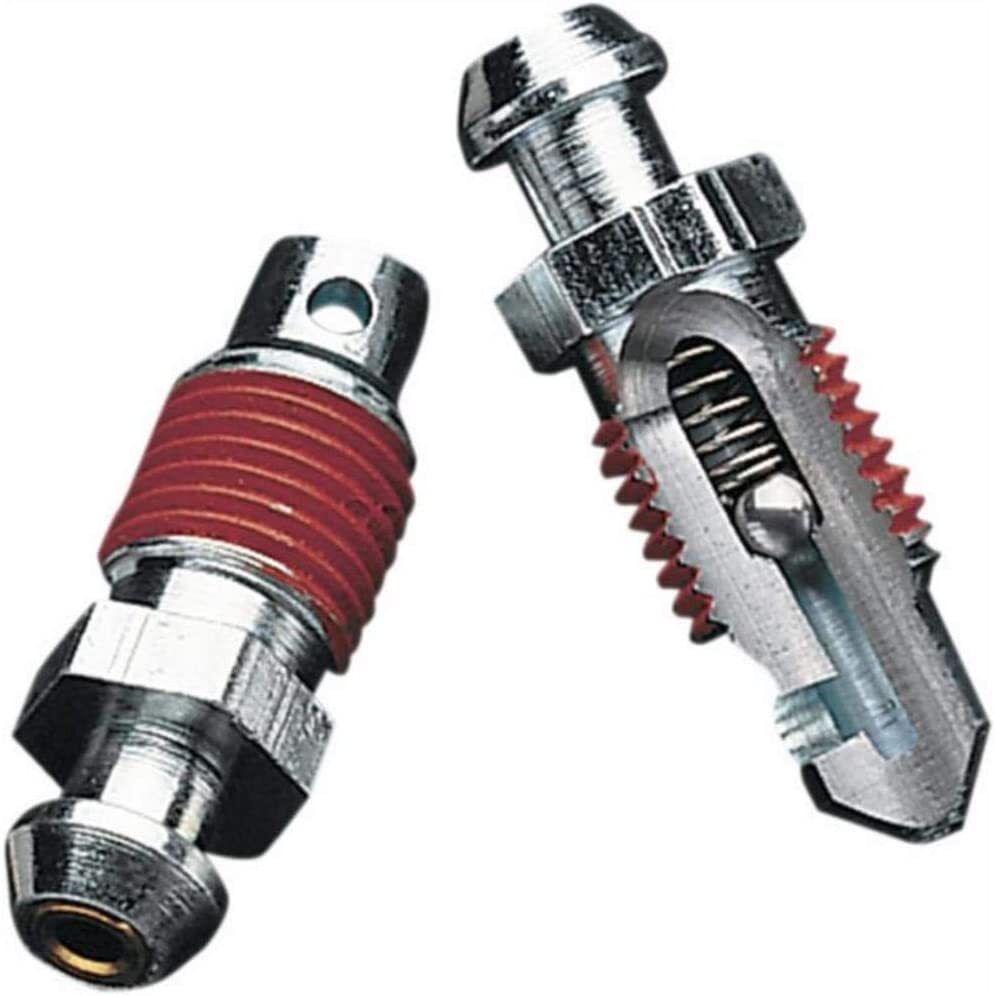
The first option is Speed Bleeders. These replace the bleeder screw at each wheel with one equipped with a small check ball and spring, making the screw a one-way valve when the check ball is loosened. Connect a hose to the bleeder, open the screw, pump the pedal until no more air is being pushed out, then tighten the bleeder and move to the next wheel. The method is pretty simple, but it does require changing out the bleeder screws.
If you want to accomplish the same task without buying bleeder screws, use a simple bottle and a hose. An empty brake-fluid bottle is often best, but you can create these devices with any number of containers.
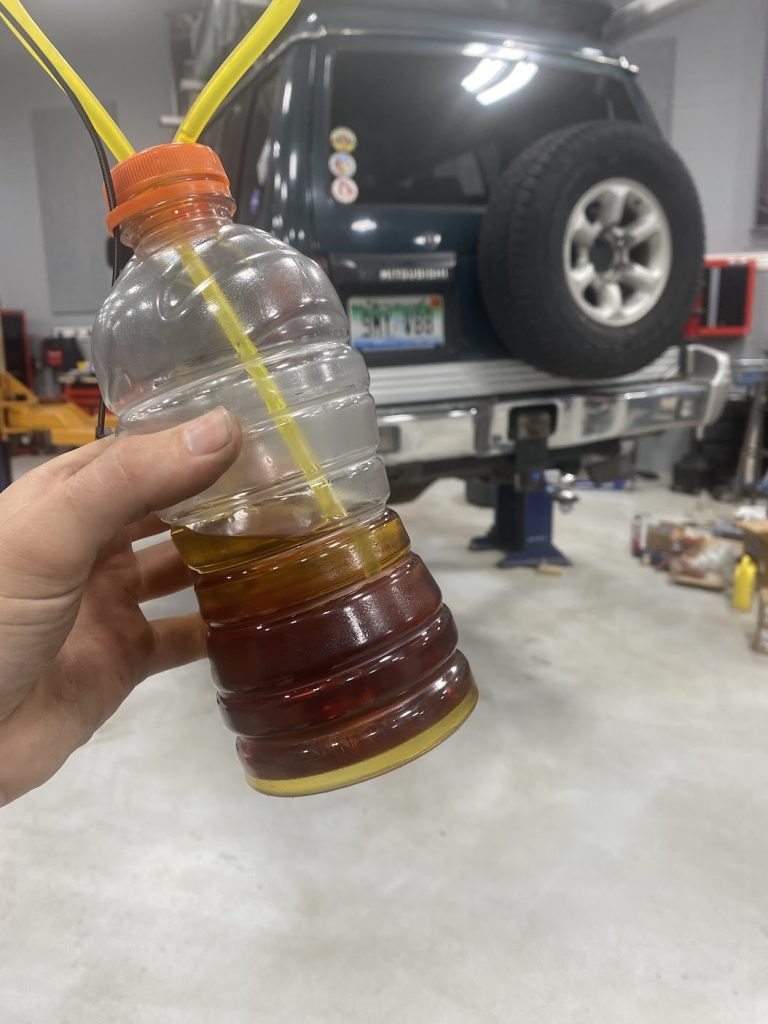
Start by pouring a small amount of clean brake fluid into the bottle, then insert a hose, making sure the end will stay submerged in the clean fluid. Then connect the loose end of the hose to the bleeder screw. Open the bleeder screw and pump the pedal slowly to push the fluid and those pesky air bubbles through the system. The bottle will slowly fill as the fluid is pushed out, and since the end of the hose is submerged, it should prevent any air from being pulled back into the brake system.
To make the process even easier, add a cable tie or piece of string to hold your new bleeding apparatus above the brake calliper or wheel cylinder, a position which encourages the trapped air to rise up the hose. Cut a hole in the upper part of the bottle so that air you’ve expelled from the system can also escape the bottle and not cause unwanted pressure inside that as well.
Pressure
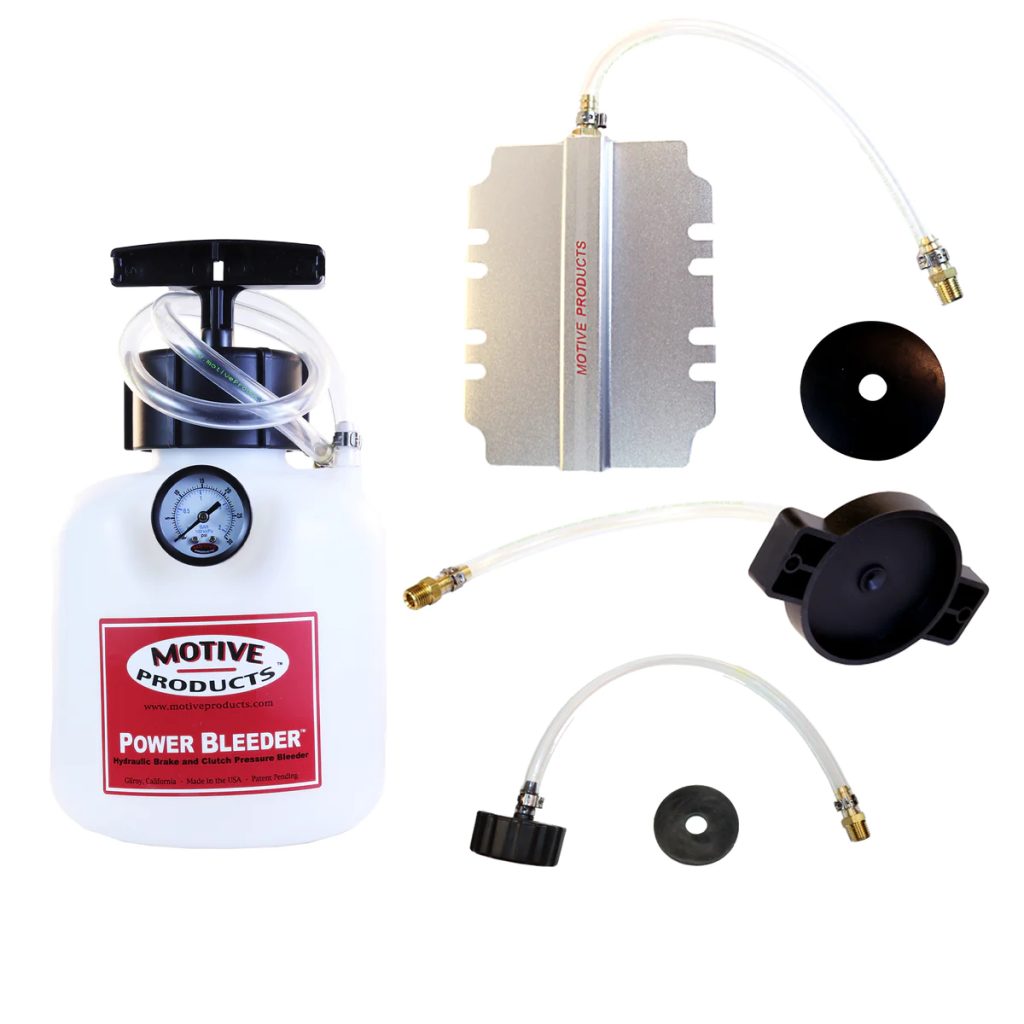
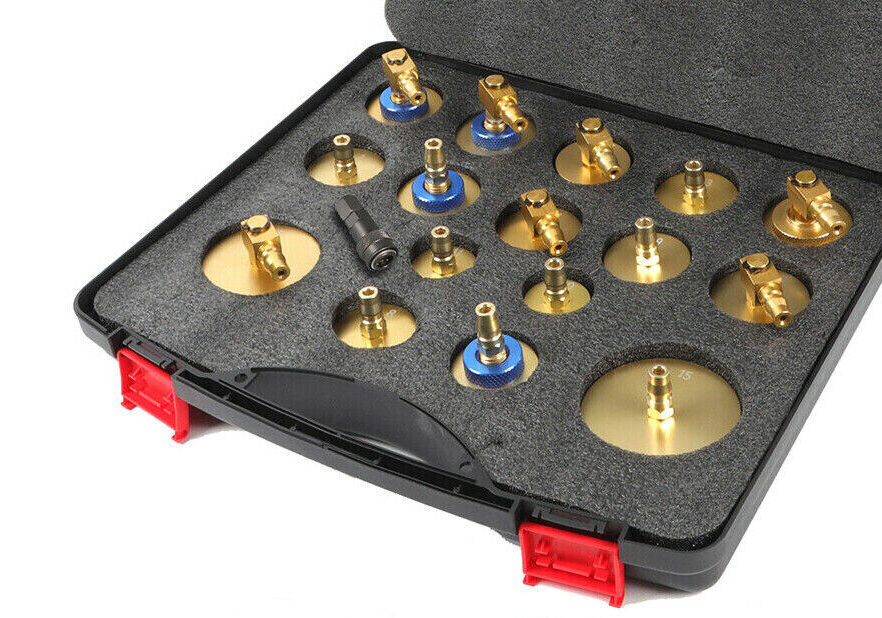
Sure, the options above are various ways to apply pressure, but they all use the brake system to create the fluid’s push. Another method uses an external tool to place pressure on the brake master cylinder without someone operating the pedal.
The system of tools pictured above creates a steady pressure that keeps air bubbles moving, preventing them from getting stuck in little pockets like proportioning valves or distribution blocks.
Using one of these makes the bleeding process easier, but it also requires extra care when setting up and when topping off the fluid during the bleeding process. Since the master-cylinder reservoir is under pressure while this system is in use, there’s a risk that the outer gasket of the tool leaks while you’re forcing pressure through the brake lines or when you take the tool off to top up the reservoir. Since most brake fluids easily strip paint, don’t take this risk lightly.
Vacuum
Maybe the other methods covered here are too pressured for you. Luckily, this option is the opposite. We are talking about negative pressure – vacuum, to be precise.
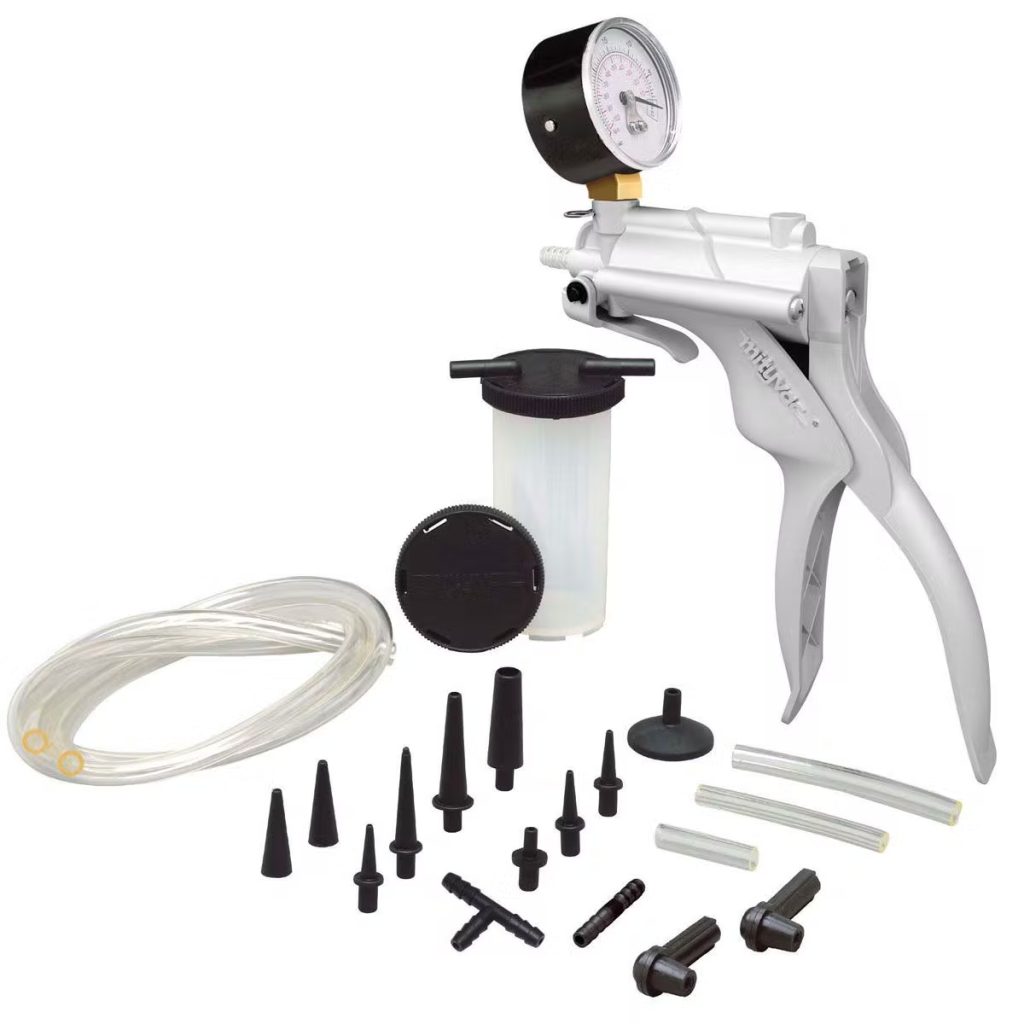
Rather than using the master cylinder to push fluid through, this vacuum tool pulls fluid through the system from the bleeder screw. Vacuum tools make quick work of bleeding a brake system that is dry, or one in which many parts have been replaced (in such a situation, you’ll need to draw fluid over a larger distance).
Products like the MityVac use a hand pump to create the vacuum, but other options are connected to a compressed-air source to pull a vacuum without the need for manual operation.
These tools can be a decent investment if you are bleeding brakes regularly, but if you’re only doing this once or twice a year, the extra effort needed for the other tool-less methods might be worth the savings.
No matter how you decide to bleed your brakes, use the correct fluid recommended by the vehicle manufacturer and follow the process to ensure you have safe and predictable stoppers. Have a tip? Leave a comment below.
Via Hagerty US
Check out the Hagerty Media homepage for daily news, features, interviews and buying guides, or better still, bookmark it.


A rubber pipe bleeding tool can be made a bit better by blocking the end of the pipe and then making a cut along the side of the tube. When submerged in fluid it acts as a one way valve.
The tools that can be bought to prevent fluid loss when changing a brake component can be applied to pipework to trace a stubborn bubble. If fitted and the pedal comes up there is your air. But don’t over tighten or use vice grips.
One thing that is frequently overlooked is the properties of DOT fluid. Two things that happen with DOT is the fact that it absorbs both air and water. Placing it under vaccum prior to use is the way to remove both from fluid prior to use. What happens when a system is loaded with fresh air/water free fluid is a firmer pedal feel that is more resposive. Also longevity of system components since teh system is water free.