
In our experience, full classic car restorations happen in one of two ways. Firstly, there’s the ‘Tinker Too Far’. You start cleaning/ fixing something and take it apart, only to notice another part of the car in need of attention. Before long you’re surrounded by bits and it just seems easier to keep going than to put it all back again.
Secondly, there’s the planned restoration. These are usually the result of either a major component failure (usually engine/ gearbox) or severe bodywork corrosion. Either way, you decide to do the job properly. Everything is planned, parts are listed for re-chroming or repair and you even get quotes from various professionals for their expert services.
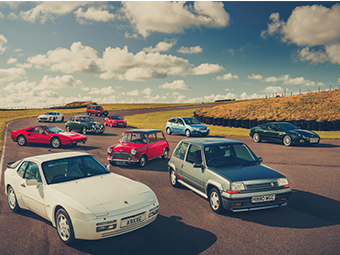
What actually happens when the restoration starts will bear no resemblance to your plan. Parts you expected to be simple to restore are usually the ones that break as you remove them. A telephone call to your handy spares supplier will result in peals of laughter as they explain you have more chance of finding a flying pig than the widget you need. As timescales and budgets stretch into the next decade, you find yourself yearning for the simple days when all you did was drive the damned thing.
So, to help you through the restoration of your classic car or bike, we asked members of the Hagerty if they had any classic restoration tips to help retain your sanity and return your classic vehicle to the road as soon as possible.
Tips from Ian (4-door Range Rover)
- Throw nothing away. Never throw away a damaged or broken part until you’ve either found a replacement or fabricated a replacement. Over time you can quickly forget what that small part of trim looked like or the pattern which was on it!
Tips from Tim (Ford Escort Mexico)
- Mark everything, and make sure any tags or labels you write out are with a decent pen and if possible water proof, so if they get damp or covered in oil you can still see what you have written!
- Light it up. Invest in a good quality lamp and use plenty of light.
- Double the budget. Any time scale and budget that you start with, double it and then add a little bit more!
- Use the clubs. Find local classic car owners groups/clubs, always helpful for manpower and borrowing of tools but always remember it’s a two-way street!
Tips from John (VW Bay Camper)
- Photograph Everything. Most of us have old digital cameras lurking in drawers of junk. Dig one out and charge it up, then leave it in the garage and take photos of everything. When I took the dash out of my VW Type 2 camper last year, the photo of the back of the gauges made my life so much easier when it came to putting it back together.
- Invest in a heat sealer. A polythene tube roll and a heat sealing machine is a great combination. As you remove bits, seal them with their fixings in a bag- that way they don’t get lost, they can be stored without oil getting everywhere and they won’t rust even if left in a damp place.
Tips from Dan (Rover SD1)
- Pay someone else to do it!
Tips from Charlie (MGB)
- Don’t put your tools on top of the battery and disconnect it before you start working on anything. Ask me how I know! I once told a master technician a Saab GB not to put his tools on top of the battery and then had to run for my life as they tried to shut me in the boot of a 9-5 Aero!
Tips from Phil (Series V Alpine rally car)
- Take your watch off. It’s surprisingly easy to break the face!
- Use the right tools. This will save you SO much time and effort.
- Set aside space for the removed parts. This will help you sort them and not lose anything.
Tips from Ste (2CV)
Save your old tee shirts. You will never run out of a need for clean rags!


Just about to start taking a Rover SD 1 V8 3500cc engine apart to stop it smoking ( suspected Piston Ring problems).Will report findings.
Disassemble smaller items containing tiny parts on a large tray with a raised edge (an old baking tray is ideal for this). Dropped parts will have less chance of escaping and ending up on the floor…
Remember you can buy fairly expensive tools use them and sell them on. So it’s cheap in the long run.
Always have a fire extinguisher in your work space Always have a second person around when working on fuel systems and or welding Never work solely off a trolley jack Wherever when dismantling screw the nuts and bolts back into their original location, keep parts in groups
Easy. Just buy a Model T Ford ( 1909 – 1927 ). Every body type you could want. All the parts are available off-the-shelf with the Club, plenty of specialists and manuals / literature, easy to work on and guaranteed smile-a-mile from driver, passengers and onlookers. + £100 a year Comprehensive Insurance with Hagerty!
I liked Ian’s tip not to get rid of anything while you’re working on your car. It’d be tragic to be missing one little piece because you didn’t understand it’s purpose and just threw it away. My brother is working on restoring a car at the moment so I’ll send this article to him too.