Jesse Crosse started as a motoring hack in 1982, was launch editor of Performance Car magazine and signed up an unheard writer called Jeremy Clarkson. He now writes about automotive technology, and spends his time restoring a pair of fast Fords, a 1968 GT390 Mustang fastback, and the same Ford Sierra Cosworth long-term test car he ran while editor of Performance Car. Here he shares tech tips for the have-a-go DIY car enthusiast.
One component that all petrol engines have in common, from veteran cars right up to the present day, is the spark plug. It’s something that’s easy to take for granted and even neglect until the engine misfires or won’t start and then for classic cars owners, it can be one of the first ports of call for trouble-shooting.
Before getting into the detail of these simple looking things which have no moving parts, let’s look at the basics of what a spark plug does. In simple terms it provides a hot, precisely-timed electrical spark which ignites the mixture of fuel and air in the combustion chamber of each cylinder. If the plug fails to spark that cylinder won’t fire and if several or all the plugs fail to spark, the engine won’t run.

All spark plugs consist of a steel case which screws into the cylinder head. Inside that is a ceramic insulator and, Russian Doll-style, there’s a central electrode inside that. When the centre electrode is fed with a high-tension current (high voltage, low amperage) from the ignition system, a tiny bolt of lightning jumps from the tip of the centre electrode to a second electrode on the plug’s casing (earthed to the electrical system via the engine) and ignites the fuel air mixture.
So far so good, but because older classics lack the electronically-controlled fuel and ignition systems of modern cars, understanding spark plugs and keeping an eye on them is important. The main, obvious mechanical differences between different types of spark plugs are the ‘reach’ of the threaded section that screws into the cylinder head which can be long or short, the diameter of the thread, and whether the centre electrode is protruding from the bottom of the plug or not.

The really crucial thing though is the heat range, which can vary dramatically between plugs that, judged on outward appearances, look the same. Plugs are roughly classified as “hot” or “cold”, which relates to the type of engine they’re fitted to and the temperatures inside the combustion chamber, and this is the confusing bit. A low heat range plug is “hot” and a high heat range plug is “cold”. Think of it another way, the cold plug is used where combustion temperature inside the engine is high, and a hot plug when it’s lower (cold). A high performance engine is more likely to have higher combustion temperatures and need a cold plug (to conduct heat away from the firing tip) and a relatively low powered engine, a hot plug (to maintain a high enough temperature at the tip).
The difference is the ability of the electrode to conduct the heat of combustion away from the tip. A cold plug needs to conduct more heat away, and has less ceramic insulator exposed to the combustion flame inside the barrel of the plug. A hot plug is the opposite and less of the insulator is exposed. This is why it’s important to fit the correct plug specified for the engine. A cold plug in a cold engine can cause rapid fouling of the plug and misfiring, but worse, a hot plug in a hot engine can cause serious damage not just to the plug but the engine’s valves and pistons.
The simple rule of thumb is, never, ever, guess which plug your engine needs, always look up the correct plug in a workshop manual. This doesn’t mean being restricted to one brand and although the numbering systems vary (printed on the external part of the ceramic insulator) they can easily be cross-referenced between, say, Champion and NGK. The only exception to this is if an engine has been highly tuned. Then there should be information available on which plug to use from the tuning parts suppliers or engine builders.
Spark plug maintenance is straightforward. First, lift away the high-tension leads, noting the order as you do. Before removing spark plugs using a spark plug spanner and with the engine cold, clean around the top of the thread if possible using a rag, small paintbrush or an airline if you have one to avoid any debris falling into the cylinder when the plug is removed.
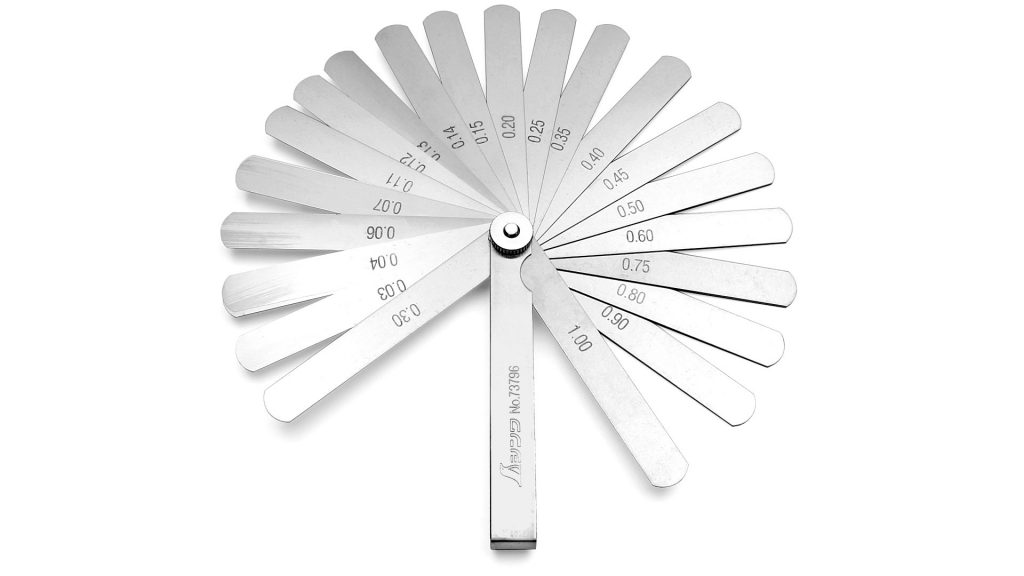
Using a hand wire brush, you can rub deposits from the electrode and then resetting the gap between the electrodes. The gap is important as it has an impact on timing of the spark, and that in turn affects the running of the engine and its running temperature. Check the gap meets what’s detailed in the workshop manual, using a set of feeler gauges (inexpensive, at less than £5). The gap is correct when the electrodes are lightly pinching (but not gripping) the blade of the gauge, not too tight and not loose.

A dab of graphite grease on the thread when replacing the plug helps removal next time and is kind to the thread in the cylinder head, especially an alloy cylinder head. Spark plugs either have a tapered shoulder to make the gas seal, or a metal crushing washer. Whatever the case, avoid overtightening and damaging the thread in the cylinder head. Screw the plug in finger tight, then tighten to the correct torque using a torque wrench. If you can’t find a torque setting for your particular car, spark plug manufacturer websites usually give recommendations.
Torque settings vary for different plug diameters and whether the cylinder head is alloy or cast iron. If you can’t use a torque wrench for any reason, tighten a new plug with crushing washer finger tight, then tighten a half to two thirds of a turn. For a tapered seat plug, it’s only about one sixteenth of a turn. If replacing a used washer-seat plug, the washer will already be crushed and have less “give” so the amount of turn from finger tight to fully tight will be closer to that of a taper plug. The difference is one reason why a torque wrench is the best option. Once the plugs are installed, refit the high-tension leads in the right order and the engine should be ready to go.


