My modern Ducati decided not to start. Or even show any enthusiasm for an ignition light.
Because it was such a clear-cut failure I thought it might be something obvious.
I eased off the side panel with the caution of a bomb disposal expert working on a 500-pounder… and then in one smooth transition of u-turn movement replaced it with the discretion of Chris Packham putting back a piece of Amazonian tree bark under which was living a colony of two-inch long wasps…
No way was I going failure-hunting in what looked like the contents of the panel below Spock’s work station on the Enterprise.
Older bikes are easier to maintain. There are six wires on my 1971 Honda 50, and a handful of things that need watching and maintaining: brakes, cable, oil and bulbs.
Of course, there’s bigger stuff. I’m reminded of a Brit adventurer suffering a clutch failure on his Honda Cub in the Punjab, and getting it fixed by a roadside mechanic who replaced clutch plates with straw that lasted a further 500 miles. Clutches are to be filed under “Wouldn’t touch it with yours”, so far as I’m concerned.
But most old bikes you can look at and work out how something operates with a bit of studied chin rubbing or handbook consultation.
First, arm yourself with a set of spanners – checking whether your bike is metric or AF – and methodically work from one end of the bike to the other ensuring nothing is loose. Better still, invest in a torque wrench to make sure everything is tightened correctly, and, where required, held in place by a split pin.
Wheels: if you have spoked wheels, dink your way round them tapping each spoke with a spanner. If one makes a really different noise, then it’s loose or broken. Easy to tighten with the correct tool, but if broken, then it’s time to remove the tyre.
Check tyre pressures. The most obvious can be overlooked. But it’s your only contact with the road.
Brakes are best maintained with bike on centre stand. With each wheel off the ground, adjust cables by tightening things up until the brake shoes just catch the drum, then back off the adjustment half a nadger. A nadger is a well-known unit of measurement amongst classic bike fixers. If you run out of adjustment, then it’s likely the cable is needs replacing, or the shoes are finished.
Time to consult the workshop manual.
Hydraulic disc brakes? If you’re brave enough, it’s all about keeping an eye on how much meat is on the pads, and occasionally topping up or replacing brake fluid.
Chains are tricky. Unless you know how to recognise a worn chain you may overlook something crucial. Fundamentally, if you can tug the chain off the sprocket and see daylight between them, or there’s more than around half a chain’s width of sideways movement, or there’s back and forward movement between links, then it’s time to replace.
Chains really benefit from maintenance: take it off the bike using a chain link remover – easily available – soak it in chain cleaner, then in chain lube. Worn chains are dangerous. If it jumps the sprocket and jams the back wheel, then you’re about to participate in a crash.
On the subject of oil, changing engine oil and replacing a filter generates fear in many home mechanics. But it’s very simple: buy the correct oil, correct filter, and correct oil drain plus o-ring or washer. Bike on centre stand, remove oil filler cap, remove oil drain plug (having got yourself a drain tray or made one from an old one-litre container), drain it, replace filter (sometimes they just screw off and on, sometimes they’re bolted) and leave your machine to bleed out. Check for bits of metal in the drained oil – they could be signs of imminent failure. Dispose of responsibly.
The other filter is the air filter: sometimes you just swap them out, although some bikes have filters which can be cleaned, soaked in oil and replaced.
After checking it’s going to stay in one piece and stop, check the go-department: the throttle. Having one stick open is no fun, so check that it opens AND closes. If a throttle is sticky, and you understand the workshop manual, then dismantle it from end-to-end. Worn cables can deprive you of full performance, but can also fray and cause the throttle to stick open.
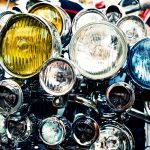
Finally, not all bikes have brake lights linked to both brakes. Friend of mine spent half-an-hour trying to work out why the front brake on his newly-acquired classic didn’t illuminate the brake light. He was imagining all sorts of hidden Victorian steam engineering solutions buried inside forks and frames.
Simple answer was that the brake light worked only from the rear pedal.
A lightbulb moment of classic ownership.
We hope you like the photographs. Given the coronavirus constraints, we’ve had to improvise; these photos of a scale model of a 1960s race bike were very competently shot by the author’s daughter, Charlotte Macauley.
Hagerty want to remind everyone to stay within their ability: if in doubt, consult a professional mechanic, and remember you work at your own risk.